📅 Last updated:
Cleaning an automatic feeder is less about making it look spotless and more about preventing old food, grease, moisture, and bacteria from building up inside the parts your pet eats from. If you clean it incorrectly, water can reach the motor or control board, food can swell inside the dispensing chute, and scented cleaners may discourage your pet from eating. A neglected feeder can also jam, deliver inconsistent portions, or attract insects.
The good news: most dry-food automatic feeders can be cleaned in 15 to 30 minutes once you know which pieces are removable. Always prioritize your specific manual if its instructions differ.
As an Amazon Associate we earn from qualifying purchases at no extra cost to you.

📋 Table of Contents
What You Need
| Item | Why | Optional? |
|---|---|---|
| Warm water | Loosens food oils and residue without stressing plastic parts | No |
| Unscented dish soap | Cuts grease and removes food residue | No |
| Soft sponge or microfiber cloth | Cleans bins, lids, trays, and exterior surfaces without scratching | No |
| Soft toothbrush or small cleaning brush | Reaches the dispensing chute, seams, and portion wheel | Recommended |
| Dry towel | Removes moisture before reassembly | No |
| Vacuum or handheld brush | Clears crumbs from the motor housing and feeding area | Optional |
| Clean, dry container | Holds unused kibble while the feeder is being cleaned | Recommended |
Do not use bleach, ammonia, abrasive powders, scented sprays, steel wool, or boiling water unless the manufacturer specifically permits them. A food-safe, unscented cleaner may be useful for stubborn residue, but plain soap and water are usually sufficient.
Step-by-Step
See also: 7 Best Refillable Frozen Dog Treat Toys for Long-Lasting Licks • Best Dog Door Mat for Muddy Paws: Sizing, Materials and Picks by Entryway
1. Empty the feeder and unplug it (2–3 minutes)
Stop the feeding schedule or switch the feeder to manual mode, then remove the power adapter from the wall. If the unit has a battery backup, remove the batteries as well. This prevents an unexpected dispensing cycle while your fingers are near the portion wheel or chute.
Pour the remaining kibble into a clean, dry, airtight container. Check the food for dampness, clumping, insects, or an off smell. If it is stale or contaminated, discard it rather than returning it to the feeder. Never clean around loose kibble while the device is still powered.
2. Separate removable food-contact parts (3–5 minutes)
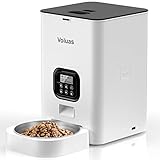
Remove the food hopper, lid, feeding tray, chute cover, and any detachable portion wheel or bowl. Many 4-liter automatic feeders have a removable top reservoir and a separate bowl, but the exact design varies. Take a quick photo before disassembly if you are unsure how the pieces fit back together.
Do not pull apart the motor, wiring, control panel, speaker, power socket, or sealed base. A voice-recording feature, such as the 10-second recorder found on some feeders, does not make the electronic housing washable.
3. Remove dry crumbs before adding water (2–3 minutes)
Shake loose kibble into the waste bin or container. Use a dry cloth, soft brush, or handheld vacuum to clear crumbs from the dispensing opening, seams, and the area where the hopper meets the base. Removing dry debris first prevents it from turning into a sticky paste when wet.
Pay close attention to the chute. A thin layer of oily kibble dust can narrow the opening and contribute to portion errors or jams.
4. Wash the removable parts (5–8 minutes)
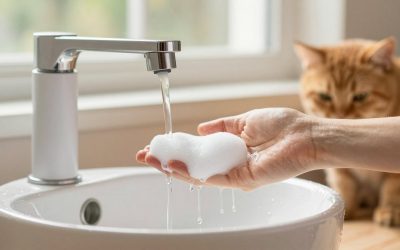
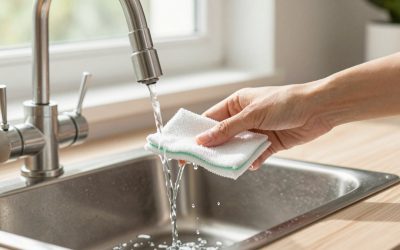
Fill a sink or basin with warm water and a small amount of unscented dish soap. Wash the hopper, lid, tray, and bowl with a soft sponge. Use a soft toothbrush to clean corners, locking tabs, rubber seals, and the underside of the lid.
For stuck-on grease, soak plastic parts for 5 to 10 minutes before scrubbing gently. Avoid sharp tools that can gouge plastic. Those scratches can hold food residue and make future cleaning harder.
Check whether each part is dishwasher-safe before placing it in a machine. If the manual does not clearly approve dishwasher use, hand-wash the component instead. High heat can warp a hopper, weaken a seal, or make a bowl fit poorly.
5. Clean the nonremovable base carefully (3–5 minutes)
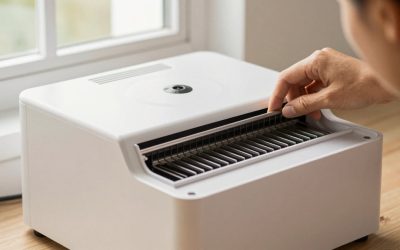
Never submerge the feeder base or run water over it. Instead, dampen a microfiber cloth with soapy water, wring it nearly dry, and wipe the exterior, dispensing opening, buttons, and nearby surfaces. Use a barely damp cotton swab or soft brush around crevices.
Keep water away from the power inlet, battery compartment, display, speaker openings, and seams around the motor. If food is lodged inside the mechanism, unplugged and dry brushing is safer than forcing water into the housing. Do not spray cleaner directly onto the unit.
6. Rinse and dry completely (10–20 minutes)
Rinse all washed parts with clean water until no soap remains. Soap residue can transfer to food and may make a pet refuse the next meal. Shake off excess water, then dry each piece with a clean towel.
Allow the parts to air-dry fully before reassembly. Depending on humidity, this may take 10 to 20 minutes or longer. The hopper, lid, seals, and chute must be completely dry; even a small amount of moisture can soften dry kibble, encourage mold, or create a blockage.
7. Reassemble and test the mechanism (3–5 minutes)
Reinstall the portion wheel, chute, hopper, lid, bowl, and tray in the order shown by the manufacturer. Make sure the hopper is seated evenly and the lid closes securely. A loose seal can let in humidity and pests.
Reconnect power only after the base is dry. Add a small test amount of kibble—roughly ¼ to ½ cup, depending on your feeder’s capacity—and trigger one manual portion. Confirm that food travels through the chute and lands in the bowl without spilling.
Do not fill the entire reservoir until the test succeeds. Once it does, refill with fresh, dry food and verify the next scheduled feeding. For models designed to serve up to eight meals per day, check that the programmed schedule was not erased during cleaning.
Mistakes to Avoid
- Submerging the whole feeder: Water can damage the motor, timer, speaker, or power circuitry.
- Cleaning while it is plugged in: Unplug first and remove backup batteries before reaching into the chute.
- Reassembling while damp: Moisture can make kibble swell and clog narrow dispensing channels.
- Using scented or harsh chemicals: Residue and strong odors may irritate pets or cause food refusal.
- Overfilling immediately after cleaning: Test one or two portions before loading the full 4-liter hopper.
- Ignoring the bowl: The bowl often collects saliva, crumbs, and grease faster than the reservoir. Wash it regularly.
- Scraping with metal: Scratches in plastic can trap residue and bacteria.
- Returning questionable kibble: Discard food that smells stale, looks moldy, or has absorbed moisture.
How Often
Wash the feeding bowl every day or every other day, especially if your pet eats wet food, has a sensitive stomach, or leaves food sitting in the bowl. Wipe visible crumbs from the chute and tray at least twice a week.
For a dry-food feeder, wash the hopper and other removable food-contact parts about once a week. Clean sooner if the food is oily, the room is humid, or the feeder shows residue or a smell. Give the base and dispensing mechanism a dry-brush inspection weekly.
Perform a complete clean before adding a new bag of food, after a pest problem, or whenever the feeder has been unused for more than a few days. In 2026, many timed feeders still rely on basic plastic chutes and small motors, so regular maintenance remains important even when the controls are digital.
When to Call a Pro or Replace
Contact the manufacturer or a qualified appliance technician if the feeder smells like burning plastic, trips a breaker, makes grinding noises, becomes unusually hot, or shows signs of damaged wiring. Stop using it if the power cord is frayed or the housing is cracked near the electronics.
Replacement is usually more practical than repair when the motor repeatedly jams after thorough cleaning, portions vary significantly, the lid no longer seals, or replacement parts cost a large share of a new feeder. A damaged seal or bowl may be worth replacing separately if the manufacturer sells parts.
FAQ
Can I put an automatic feeder in the dishwasher?
Only put removable parts in the dishwasher if the manual or molded label says they are dishwasher-safe. Never place the electronic base, motor housing, power cord, or control panel in a dishwasher.
How do I clean an automatic feeder that has mold?
Unplug the feeder, discard affected food, and wash removable parts thoroughly with warm water and unscented dish soap. Dry everything completely. If mold is inside the sealed motor housing, embedded in damaged plastic, or still smells after cleaning, replace the affected part or the feeder.
Why is my feeder dispensing less food after cleaning?
Check for damp kibble, a partially blocked chute, an incorrectly seated portion wheel, or a hopper that is not locked into place. Run several manual test portions with dry kibble. If the amount remains inconsistent, the motor or sensor may need manufacturer service.
Can I use disinfectant wipes on the feeder?
Use them only on exterior surfaces if the label says they are safe for food-contact areas, and follow the required rinse time. Do not wipe the inside of the hopper or chute with a product that leaves fragrance or chemical residue. Plain soap and water are the safer routine choice.