📅 Last updated:
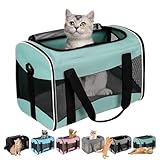
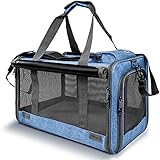
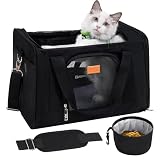
A torn pet carrier mesh panel is more than a cosmetic problem. A small rip can widen when a cat or dog scratches, while loose threads may catch claws, collars, or teeth. A poorly placed patch can also block ventilation, create sharp edges, or leave a weak spot that fails when you lift the carrier. The safest repair matches the original mesh as closely as possible, reinforces the tear on both sides when possible, and leaves every zipper, buckle, and ventilation panel working normally. The method below works for many soft-sided carriers, including budget models such as the $29.99 GAPZER Pet Carrier and the $14.39 ROYPET Cat Carrier. Always test the finished repair before trusting it with a pet.
📋 Table of Contents
Quick answer: Our top pick in 2026 is the Replacement pet-safe mesh — our #1 rated choice. See the full ranked comparison, alternatives and buying advice below.
What You Need
| Item | Why | Optional? |
|---|---|---|
| Replacement pet-safe mesh | Matches or covers the damaged panel; choose vinyl-coated polyester or tightly woven nylon mesh. | No |
| Polyester thread, bonded if available | Resists moisture and abrasion better than cotton thread. | No |
| Heavy-duty hand-sewing needle | Pierces carrier fabric and mesh without bending easily. | No |
| Small scissors | Trims damaged mesh and thread cleanly. | No |
| Flexible measuring tape or ruler | Measures the tear and replacement patch accurately. | No |
| Fabric clips or masking tape | Holds mesh flat without making extra holes. | Yes |
| Thimble or needle-nose pliers | Helps push and pull the needle through thick layers. | Yes |
| Seam sealant labeled for fabric | Adds water resistance and covers exposed thread ends. | Yes |
| Paper or thin cardboard | Supports the panel and prevents accidentally sewing the carrier shut. | Yes |
Buy a patch at least 1 inch wider than the tear on every side. For example, a 2-by-3-inch rip needs a patch measuring at least 4-by-5 inches. Use mesh with openings similar to the original: a very tight fabric can reduce airflow, while a wide net may allow claws to push through. Avoid duct tape, staples, hot glue, and exposed wire. They can peel, cut skin, or become chewable debris.
As an Amazon Associate we earn from qualifying purchases at no extra cost to you.
Step-by-Step
See also: How to Set Up Timed Pet Feeder (2026): Step-by-Step • Water Fountain Buying Guide for Multiple Pets in 2026: What Actually Matters
1. Inspect and clean the carrier (10 to 15 minutes)
Remove your pet, bedding, toys, and any detachable base. Open every zipper and buckle so you can see whether the damage affects a seam, frame, or restraint strap. Gently brush away hair and debris, then wipe the surrounding fabric with a barely damp cloth and mild soap. Let it dry completely.
Measure the torn area in two directions. Check for additional thinning by lightly pressing around the opening with a fingertip. If the fabric feels papery, pulls away from the stitching, or has several nearby holes, a single patch may not be enough. Photographing the original panel before cutting can also help you preserve the correct orientation and ventilation area.
2. Stabilize the tear (5 to 10 minutes)
Place a piece of paper or cardboard inside the carrier behind the damaged panel. This keeps the front and back layers from being sewn together. Smooth the mesh without stretching it. If the rip has jagged edges, trim only loose strands and obviously frayed material. Do not cut away a large section unless you are replacing the entire panel.
For a short slit under about 1 inch, bring the edges together with small, even stitches. Leave a gap no larger than 1/8 inch. For a larger hole or missing section, use a patch rather than pulling the edges tight, because stretched mesh can distort the carrier and reduce airflow.
3. Cut and position the patch (10 minutes)
Cut replacement mesh with rounded corners to reduce snagging. The patch should extend at least 1 inch past every edge of the damaged area. For a carrier panel that is under tension, extend the patch 1 1/2 inches past the tear where space allows.
Place the patch on the outside if the pet can reach the inside surface, then inspect the interior for rough edges. If possible, add a second patch inside the carrier so the original mesh is sandwiched between two layers. This creates a stronger repair, but do not cover an entire ventilation panel with solid fabric. Align the openings and avoid zippers, corner seams, elastic trim, and identification labels.
4. Sew the perimeter (20 to 40 minutes)
Thread a heavy-duty needle with approximately 24 to 30 inches of polyester thread. Longer thread tends to knot and tangle. Make a knot on the outside or between the mesh layers where your pet cannot reach it.
Start on a strong section of carrier fabric, about 1/4 inch from the patch edge. Use a backstitch for strength: push the needle through both layers, bring it up a short distance ahead, then stitch back into the previous hole. Keep stitches about 1/8 to 1/4 inch apart. For thick trim, 1/4-inch stitches are usually easier and avoid excessive perforation.
Sew all four sides, keeping the patch flat but not stretched. At each corner, make two stitches in the same area rather than sharply folding the mesh. Finish with three small backstitches, then tie two tight knots. Leave thread tails no longer than 1/4 inch and tuck or seal them with a small amount of fabric seam sealant after checking that the product is fully cured before use.
5. Reinforce high-stress areas (10 to 15 minutes)
Pay special attention to the top corners, bottom corners, and areas next to a zipper. These locations experience more pulling when the carrier is lifted or opened. Add a second row of stitches about 1/8 inch outside the first row if the surrounding fabric is sturdy enough.
Do not sew through a load-bearing shoulder strap, handle anchor, plastic frame, or safety tether unless you have the equipment and experience to recreate the original construction. A mesh patch can repair ventilation fabric, but it cannot restore a structurally damaged handle or restraint.
6. Inspect, cure, and test (24 hours plus 10 minutes)
Run a clean fingertip over both sides of the repair. Trim every sharp thread end and remove loose mesh fibers. If you used seam sealant, follow its label and allow at least the stated curing period; 24 hours is a practical waiting period when the label permits it. Keep the carrier ventilated while the product cures.
Before putting your pet inside, pull gently on the patch from several directions with approximately 5 to 10 pounds of force. This is a practical hand check, not a certified load test. Open and close the zippers at least 10 times, check that no teeth catch the repair, and inspect the carrier while holding it by its normal handles. Place a light towel inside and leave the carrier empty for 15 minutes. If any stitch pulls out, the mesh distorts, or a seam opens, do not use it.
Mistakes to Avoid
- Using tape as the final repair: Adhesive can loosen from heat, moisture, and scratching, leaving sticky residue or a chewable edge.
- Choosing solid fabric: Canvas or vinyl may block airflow across a large panel. Use breathable mesh with comparable openings instead.
- Sewing too close to the rip: Frayed edges can pull through. Keep the stitch line at least 1/4 inch from the damaged edge when the material permits.
- Making giant stitches: Spaces larger than 1/4 inch give claws and noses room to push through.
- Overtightening the thread: Tight stitches pucker the panel and can cause a new tear beside the patch.
- Ignoring the frame: A bent frame or failed handle anchor can make an otherwise neat mesh repair unsafe.
- Testing with the pet first: Always perform a hand inspection and empty-carrier test before travel.
How Often
Inspect the carrier before every trip and after every use involving scratching, chewing, rain, or rough handling. Check the mesh, stitching, zipper tape, handles, shoulder strap, buckles, and base. For a frequently used carrier, perform a more detailed inspection once a month. Replace a repair at the first sign of pulled stitches, enlarging holes, sharp thread ends, or mesh separation.
When to Call a Pro or Replace
Seek a luggage, upholstery, or outdoor-gear repair professional when the tear reaches a handle anchor, zipper, frame sleeve, or load-bearing seam; when more than 25 percent of a panel is damaged; or when the carrier uses unusual structured mesh that you cannot match. Professional work is also sensible for airline travel, where a failed closure or panel can create a serious escape risk.
Replace the carrier if the frame bends, the bottom sags, the zipper repeatedly opens, the fabric is brittle from sun exposure, or multiple panels are thinning. Replacement is usually safer than investing in extensive repairs on an inexpensive soft-sided model, particularly when the repair cost approaches roughly 50 to 70 percent of a comparable new carrier. Retire it immediately if your pet can push its head or paw through the damaged area.
FAQ
Can I repair a small tear without removing the mesh panel?
Yes. For a clean slit under about 1 inch, close the edges with polyester backstitches, keeping the stitches 1/8 to 1/4 inch apart. Add a small outside patch if the surrounding mesh is stretched or frayed. Do not pull the edges so tightly that the panel puckers.
What thread is best for pet carrier mesh?
Bonded polyester or strong outdoor polyester thread is a good choice because it resists moisture and abrasion. Avoid cotton, which can weaken when damp. Use thread that fits through the mesh openings without forcing them apart, and secure the ends where the pet cannot chew them.
Is fabric glue safe for this repair?
Glue can supplement stitching around a patch, but it should not be the only repair on a carrier that contains an active pet. Choose a flexible fabric product, follow its curing instructions, and keep your pet away until it is fully cured and odor-free. Never use hot glue on a reachable surface.
How do I know whether the repaired carrier is safe?
The patch should lie flat, preserve ventilation, and have no loose fibers, sharp edges, or accessible knots. Test the zippers and handles, pull gently on the patch with about 5 to 10 pounds of hand force, and watch for movement. If the carrier shows any structural weakness, replace it rather than relying on the mesh repair.
Ready to decide? Our #1 pick for 2026 is the Replacement pet-safe mesh.
Live price & availability on Amazon.