📅 Last updated:
Learning how to clean a soft pet carrier helps prevent lingering odors, bacteria buildup, and stressful trips for your pet. A carrier that is cleaned incorrectly can shrink, lose its shape, develop mildew, or retain strong detergent smells that cats and dogs may avoid. Excess water can also soak into foam padding and seams, where it dries slowly and creates an ideal environment for odors.
The good news is that most soft-sided carriers can be refreshed with household supplies and a careful, low-moisture method. Always check the care label first, especially if the carrier has a removable base, wire supports, faux-fur lining, or a machine-washable cover. The steps below work well for everyday dirt, pet hair, drool, and minor accidents in carriers such as a 17-by-11-by-11-inch model or a 17.5-by-11-by-11-inch carrier designed for cats and small dogs.
As an Amazon Associate we earn from qualifying purchases at no extra cost to you.

📋 Table of Contents
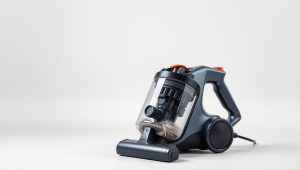
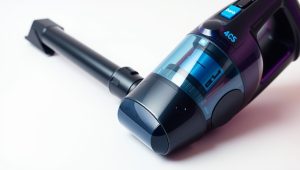
Quick answer: Our top pick in 2026 is the Vacuum with a crevice tool — our #1 rated choice. See the full ranked comparison, alternatives and buying advice below.
What You Need
| Item | Why | Optional? |
|---|---|---|
| Vacuum with a crevice tool | Removes hair, litter, crumbs, and dry debris from seams and mesh | No |
| Soft-bristled brush or lint roller | Loosens embedded fur without damaging fabric | Yes |
| Two or three microfiber cloths | Wipes the carrier without leaving much lint behind | No |
| Warm water | Helps dissolve grime and dilute cleaner | No |
| Unscented mild dish soap or pet-safe detergent | Cleans fabric, plastic, and coated surfaces with less irritation risk | No |
| Enzyme pet stain cleaner | Breaks down urine, vomit, and other organic residue | Yes |
| Old toothbrush | Reaches zippers, corners, buckles, and stitching | Yes |
| Clean towels | Blot moisture and speed up drying | No |
| Fan | Improves air circulation during drying | Yes |
Avoid bleach, ammonia, fabric softener, heavily perfumed sprays, and abrasive powders. Never combine cleaning chemicals. If you use an enzyme cleaner, follow its label directions and test it first on a hidden section of fabric.
Step-by-Step
See also: How to Set Up Timed Pet Feeder (2026): Step-by-Step • Water Fountain Buying Guide for Multiple Pets in 2026: What Actually Matters
-
Remove your pet and empty the carrier (2 minutes)
Move your pet to a safe room before cleaning. Take out blankets, toys, bowls, paperwork, and any removable base insert. Shake loose litter or crumbs outdoors, then inspect the carrier for urine, stool, vomit, wet food, or sharp debris.
Open every zipper and pocket. If the carrier has a removable metal or plastic support, remove it only if the manufacturer allows this. Do not force a frame out through a narrow opening, since bending it can prevent the carrier from standing correctly.
-
Vacuum hair and dry debris (3 to 5 minutes)
Vacuum the floor, walls, seams, corners, and underside of the removable mat. Pay special attention to zipper tracks and mesh panels. Use a soft brush or lint roller on stubborn fur, working in one direction instead of scrubbing it deeper into the weave.
If you do not have a vacuum, use a slightly damp rubber glove to gather hair. Do not wet the carrier before removing loose fur; moisture can turn hair and dust into a paste.
-
Separate washable parts (3 minutes)
Check the label for instructions on machine washing. Some mats and fabric covers can be washed on a gentle cycle with cold or lukewarm water, while the carrier shell itself should only be wiped by hand. Remove plastic stiffeners, metal bars, and foam pieces before washing anything in a machine.
For a carrier approximately 17 by 11 by 11 inches, wash removable parts separately rather than folding the entire carrier into a crowded machine. Use a mesh laundry bag for small straps or loose covers, and skip high heat unless the care label specifically permits it.
-
Mix a mild cleaning solution (1 minute)
Combine about 1 teaspoon of unscented mild dish soap with 2 cups of warm water. You want a lightly soapy solution, not thick suds. Pour it into a bowl rather than spraying the carrier directly, which makes it easier to control how much moisture reaches the padding.
For a stronger mess, use a pet enzyme cleaner according to its label. Enzyme products usually need contact time to work, so do not immediately wipe them away unless the instructions say to do so.
-
Spot-test the fabric (5 minutes, including wait time)
Dab a small amount of solution on an inconspicuous area, such as the underside of a flap. Blot with a white cloth and wait several minutes. Stop if the color transfers, the coating becomes sticky, the mesh warps, or the fabric develops a ring.
Test an enzyme cleaner separately if you plan to use one. Different fabrics and waterproof coatings can react differently, even within the same product line.
-
Clean the interior from top to bottom (5 to 10 minutes)
Dip a microfiber cloth into the solution and wring it out until it is damp, not dripping. Wipe the ceiling, side panels, back panel, and floor. Use a soft toothbrush around seams, corners, and zipper ends. Work from the cleanest areas toward the dirtiest area so you do not spread residue.
For dried messes, hold the damp cloth against the spot for 30 to 60 seconds to soften it. Lift the residue rather than scraping aggressively, which can pull threads or damage a waterproof lining.
-
Clean the exterior, mesh, and hardware (5 to 8 minutes)
Wipe the outside fabric with the same damp-cloth method. Clean mesh gently from both sides, using light pressure around the openings. Scrubbing can stretch mesh or create pulls that become escape points.
Wipe zippers, buckles, handles, and shoulder-strap clips with a separate cloth. Use the toothbrush for grit in zipper teeth, then move the zipper back and forth once the area is clean. Keep metal frame joints as dry as possible to reduce rust risk.
-
Rinse away soap (2 to 4 minutes)
Use a fresh cloth dampened with plain water. Wipe every cleaned surface once or twice to remove detergent residue. Do not saturate the carrier or soak foam padding. Soap left behind can attract dirt and may irritate a pet’s skin or nose.
If the carrier still smells after cleaning, repeat a targeted treatment instead of adding more soap. Stronger fragrance does not equal better cleaning.
-
Dry completely before use (several hours)
Press clean towels against the interior and base to absorb moisture. Unzip all openings, spread the carrier into its normal shape, and place it in a well-ventilated area out of direct sunlight. Aim a fan at the open carrier from several feet away.
Allow at least 4 to 6 hours for a lightly damp carrier to dry; thick padding or humid weather may require 12 to 24 hours. Do not use a hair dryer on high heat, place the carrier on a radiator, or return your pet while any seam, mat, or lining feels cool and damp.
-
Reassemble and inspect (3 minutes)
Replace the dry base insert and any supports. Check that the carrier holds its shape, all zippers close smoothly, and mesh panels have no new tears. Confirm that handles and shoulder straps are firmly attached.
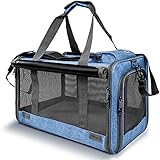
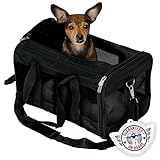
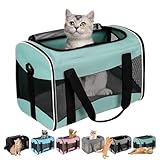
Before a trip, place a clean washable towel inside. A carrier such as the Cat Dog Carriers Soft-Sided model, listed at about $19.98, or the Vceoa 17.5-by-11-by-11-inch carrier, listed at about $19.99, should be checked against your pet’s actual size and weight limits—not price alone. One listed model is marketed for pets up to 16 pounds, but your pet must still be able to turn around and lie down comfortably.
Mistakes to Avoid
- Putting a dirty carrier straight in the washing machine: Hair and solid debris can clog the machine, while frames and stiffeners may be damaged.
- Soaking the padding: Foam can hold moisture for a long time and develop a sour or musty smell.
- Using bleach or ammonia: These chemicals can damage fabric, irritate pets, and create dangerous fumes when mixed with other cleaners.
- Masking odors with perfume: Fragrance may be unpleasant or irritating to a pet and does not remove urine residue.
- Scrubbing mesh or waterproof coatings: Excessive friction can stretch, snag, or strip the coating.
- Drying with high heat: Heat can warp plastic, shrink fabric, loosen adhesive, and deform the carrier’s base.
- Using the carrier before it is fully dry: Even a slightly damp interior can become uncomfortable and promote mildew.
How Often
Vacuum or shake out the carrier after every trip, especially if your pet sheds or tracks litter. Wipe high-touch areas such as the handle, door, and base after each use. Give the carrier a full cleaning every 2 to 4 weeks for regular travel.
Clean it immediately after an accident, vomiting, spilled food, or exposure to muddy conditions. If your pet has a contagious illness, ask your veterinarian how to disinfect the carrier safely; ordinary soap may not address every pathogen, and some disinfectants can damage soft materials.
When to Call a Pro or Replace
Contact a veterinarian for advice if the carrier was contaminated by a serious infectious illness or if you are unsure which disinfectant is safe. A professional cleaner may be useful for expensive specialty carriers with leather, technical waterproof fabric, or nonremovable foam.
Replace the carrier when the bottom sags, the frame is bent, a zipper will not stay closed, the mesh has a tear, or a handle has loose stitching. Replacement is also sensible when urine odor remains after two enzyme-cleaning attempts and complete drying. A carrier that can no longer support your pet securely is not safe, regardless of its appearance.
FAQ
Can I put a soft pet carrier in the washing machine?
Only if the care label specifically allows it. Remove all supports and use a gentle, cold-water cycle with a small amount of mild detergent. Air-dry every part completely. When in doubt, hand-clean the shell and machine-wash only the removable mat or cover.
How do I remove urine smell from a soft carrier?
Blot fresh urine first, then apply a pet enzyme cleaner as directed on the label. Give it the required contact time, blot away excess moisture, and repeat if necessary. Rinse with a clean damp cloth and allow 12 to 24 hours of ventilation before use.
Can I use vinegar to clean a pet carrier?
A diluted vinegar solution may help with some household odors, but it is not a substitute for an enzyme cleaner on urine or vomit. Test it on a hidden area first, never mix it with bleach, and avoid saturating padded sections.
How do I keep a clean carrier from smelling again?
Use a washable towel or absorbent liner, remove it after every trip, and leave the carrier unzipped to air out. Store it fully dry in a ventilated closet rather than inside a sealed plastic bin. Quick vacuuming after each use also prevents hair and food residue from becoming trapped.
Ready to decide? Our #1 pick for 2026 is the Vacuum with a crevice tool.
Live price & availability on Amazon.