📅 Last updated:
A covered litter box helps contain scatter, odors, and curious paws, but its enclosed design also traps moisture, dust, and bacteria. If you clean only the visible tray, urine can collect beneath the liner, the swinging door can become sticky, and odors may build inside the hood and ventilation openings. Strong fragrances or leftover cleaning chemicals may also discourage your cat from using the box.
The good news is that cleaning a covered litter box is straightforward when you separate daily scooping from a regular deep clean. The steps below work for most hooded models, including front-entry boxes such as the IRIS USA Large Front Door Cat Litter Box, which typically costs about $25 to $30, and enclosed models such as the Amazon Basics No-Mess Hooded Cat Litter Box, which typically costs about $35 to $40. Always check your model’s instructions before removing clips, doors, filters, or liners.
As an Amazon Associate we earn from qualifying purchases at no extra cost to you.


📋 Table of Contents
Quick answer: Our top pick in 2026 is the Disposable gloves — our #1 rated choice. See the full ranked comparison, alternatives and buying advice below.
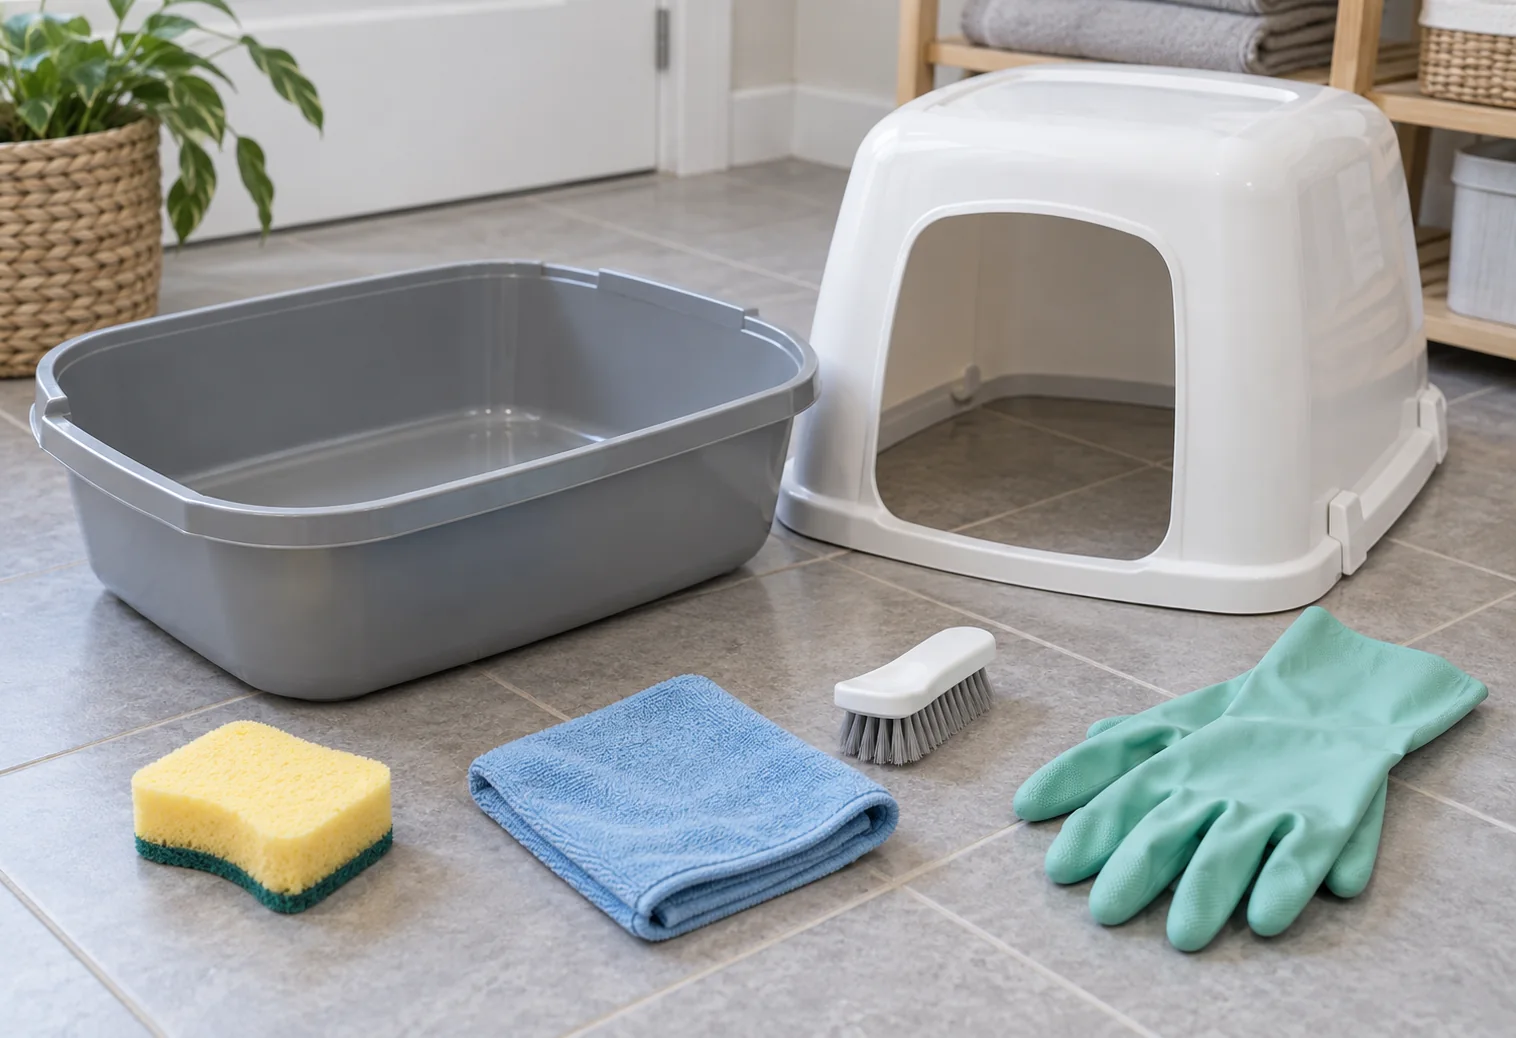
What You Need
| Item | Why | Optional? |
|---|---|---|
| Disposable gloves | Protect your hands from waste, bacteria, and cleaning solution. | No |
| Litter scoop | Removes clumps and solid waste without replacing usable litter. | No |
| Trash bag or small bin | Contains used litter and waste during cleaning. | No |
| Unscented dish soap | Cuts through residue without leaving a strong perfume. | No |
| Warm water | Rinses away soap and loosened debris. | No |
| Soft sponge, microfiber cloth, and old toothbrush | Cleans corners, seams, clips, door hinges, and ventilation slots. | No |
| Pet-safe enzymatic cleaner | Helps break down urine residue and lingering organic odors. | Yes |
| Clean towel or air-drying space | Dries the box completely before adding litter. | No |
| Replacement charcoal filter or liner | Restores odor control if the existing filter or liner is worn. | Yes |
Avoid ammonia-based cleaners, bleach, concentrated disinfectants, essential oils, and heavily scented sprays unless the manufacturer specifically approves them. Never mix bleach with ammonia or any other cleaner. Urine can release ammonia-like fumes, so ventilation matters during every deep clean.
Step-by-Step
See also: How to Remove Litter Box Odor Buildup (2026): Step-by-Step • How to Fix a Jammed Automatic Feeder (2026): Step-by-Step
1. Choose a safe cleaning location (2 minutes)
Move the box to a well-ventilated area, such as a laundry room, garage, porch, or bathtub. Keep your cat away until the box is rinsed, dry, reassembled, and refilled. If you use a sink or tub, clean and disinfect that surface afterward according to its material’s care instructions.
Put on gloves and prepare a trash bag, scoop, soap, cloths, and a towel before opening the box. This reduces the chance of carrying contaminated litter through the home.
2. Remove the cat, litter, and loose debris (5 to 10 minutes)
Take off the hood, top section, swinging door, or front flap if the design allows. Do not force clips or hinges. Empty all litter into a lined trash bag. For a box that is about 20 to 22 inches long and 15 to 17 inches wide, this may involve several pounds of litter, so lift carefully and support the base.
Use the scoop to remove stuck clumps. If a clump is firmly attached, let warm, soapy water soften it rather than prying aggressively, which can scratch plastic. Shake loose debris into the trash bag, but do not shake dusty litter indoors.
3. Inspect the parts before washing (3 minutes)
Separate the hood, base, door, filter cover, and any removable liner. Look closely at the bottom seam, corners, latch points, and underside of the rim. These areas often hold urine droplets and fine litter.
Remove a charcoal filter if it is washable according to the instructions. Many odor filters are designed to be replaced rather than soaked. Set aside any electrical component, fan, or powered odor-control module; these should never be submerged. A powered accessory may use only a few watts, but even low-voltage parts can be damaged by water.
4. Wash with warm water and mild soap (10 minutes)
Rinse the plastic pieces with warm—not scalding—water. Add a small amount of unscented dish soap to a soft sponge or cloth. Wash the base first, then the hood, door, and smaller parts. Pay special attention to the entry threshold, the inner roof, ventilation slots, and the underside of the hood.
Use an old toothbrush for grooves, clips, and hinge channels. Avoid abrasive pads, steel wool, and stiff brushes because scratches can trap odor and bacteria. If the box has a flexible flap, clean both sides and the hinge area without bending it sharply.
5. Treat urine residue and odor (5 to 15 minutes)
For persistent odor, apply a pet-safe enzymatic cleaner to the affected plastic after removing visible dirt. Follow the product’s label for contact time; some formulas need several minutes to work. Do not combine an enzyme cleaner with bleach, ammonia, soap, or another chemical.
Keep the cleaner away from charcoal filters unless the label says it is safe. Enzymatic products are useful for organic residue, but they cannot compensate for a box that has cracked, deeply scratched, or absorbed urine into a damaged seam.
6. Rinse thoroughly and dry completely (30 minutes to several hours)
Rinse every washed part until the water runs clear and no slippery soap film remains. Residue can irritate paws and may make a cat avoid the box. Wipe the pieces with a clean towel, then let them air-dry completely in a ventilated location.
Do not refill a damp box. Moisture trapped under litter encourages odor and may cause clumps to stick to the bottom. Drying time varies with humidity and the number of parts, but allow at least 30 minutes; several hours is safer if seams, channels, or a thick liner remain wet.
7. Check filters, liners, and hardware (3 minutes)
Replace a disposable charcoal filter when it is visibly dusty, wet, damaged, or no longer controlling odor. Replace a liner if it is torn, stretched, or holding urine beneath its edges. Inspect clips and hinges for cracks. A loose swinging door can trap waste or prevent the hood from sealing correctly.
Never add a scented deodorizer, powder, or essential oil just to mask an odor. Cats often have a much stronger sense of smell than people, and added fragrance can make an otherwise clean box unappealing.
8. Reassemble and add fresh litter (5 minutes)
Reattach the hood and door only after every part is dry. Confirm that clips are fully engaged and that the door swings freely. Add fresh litter to the depth recommended by the box and litter manufacturer—commonly about 2 to 3 inches, though clumping litter may call for a different amount.
Do not overfill a covered box. Extra litter can spill through the entrance, collect in the door track, and reduce usable headroom. Place the box back in its usual quiet location and give your cat access once it is ready.
Mistakes to Avoid
- Cleaning only the tray: Wash the hood, door, rim, seams, and filter cover too.
- Using strong fragrance: Perfume masks odor but can deter your cat from entering.
- Mixing cleaners: Never combine bleach, ammonia, vinegar, or other products.
- Using boiling water: Very hot water can warp some plastic parts and damage liners.
- Scraping with metal tools: Deep scratches create places for residue to collect.
- Replacing wet litter immediately: A damp base causes sticking and faster odor buildup.
- Forgetting the surrounding floor: Sweep or vacuum litter around the entrance, then wipe the floor with an appropriate cleaner.
- Moving the box without a transition: If you change locations after cleaning, do so gradually when possible.
How Often
Scoop solid waste and urine clumps at least once a day; twice daily is preferable for multiple cats or a heavily used box. Empty and wash a covered litter box about every two to four weeks for one cat, or weekly to every two weeks for multiple cats. Wash it sooner if there is a spill, strong odor, diarrhea, visible residue, or litter stuck to the base.
Replace litter according to its type and performance rather than relying only on the calendar. If the box smells soon after cleaning, check the hood seams, filter, floor beneath the box, and wall behind it before adding more deodorizer.
When to Call a Pro or Replace
Most litter-box problems do not require a professional. Contact a veterinarian if your cat suddenly avoids the box, strains, urinates frequently, has blood in the urine, or develops diarrhea. Those signs can indicate a health problem rather than a cleaning issue.
Replace the box if it has a cracked base, warped hood, broken clips, sharp edges, permanently stained plastic, or deep scratches that retain odor. Replacement covered boxes commonly cost roughly $25 to $40, depending on size and features. If an odor-control fan or powered accessory stops working, follow the manufacturer’s service instructions rather than opening electrical parts yourself.
FAQ
Can I clean a covered litter box with bleach?
It is better to use mild unscented dish soap and water unless the manufacturer specifically recommends a diluted disinfectant. Never mix bleach with urine residue, ammonia, or other cleaners. If bleach is approved, rinse extremely well, ventilate the area, and let every part dry completely before your cat uses the box.
How do I clean a litter-box filter?
Check whether the filter is washable. Many charcoal filters are replaceable and should be discarded when dusty, wet, or ineffective. If it is labeled washable, rinse and dry it fully before reinstalling. Do not put a wet filter into the hood.
Why does my covered litter box still smell after cleaning?
Inspect the underside of the hood, door hinge, rim, seams, floor beneath the box, and nearby wall. Replace a saturated filter or damaged liner, and use an enzymatic cleaner for urine residue. Persistent odor after these steps usually means the plastic is scratched, cracked, or holding residue in an inaccessible seam.
Should I remove the swinging door while cleaning?
Yes, if it is designed to come off without force. Cleaning both sides and the hinge area prevents waste buildup. If the door is fixed in place, wipe it carefully with a damp, soapy cloth and rinse the cloth often. Reinstall or test the door only after it is completely dry.
Ready to decide? Our #1 pick for 2026 is the Disposable gloves.
Live price & availability on Amazon.