📅 Last updated:
An automatic feeder jam can leave a pet without a meal, spill a day’s worth of food, or force the motor to work until it overheats. The safest way to learn how to fix an automatic feeder jam is to stop the machine before pulling at the auger or poking food deeper into the chute. Most jams come from oversized kibble, oily food, moisture, a crowded hopper, or a small piece wedged near the dispensing wheel. The process below works for many dry-food feeders, including compact 4-liter models and large-capacity units holding up to 12 liters or 50 cups.
Before starting, provide your pet with a temporary meal if the scheduled feeding time is near. Never assume a feeder that powers on is dispensing correctly; test the next portion into a bowl and watch it operate. A successful repair should restore consistent portions, not merely loosen one visible pellet.
As an Amazon Associate we earn from qualifying purchases at no extra cost to you.

📋 Table of Contents
Quick answer: Our top pick in 2026 is the Small, dry measuring cup — our #1 rated choice. See the full ranked comparison, alternatives and buying advice below.
What You Need
| Item | Why | Optional? |
|---|---|---|
| Small, dry measuring cup | Catches food and verifies the portion after the repair | No |
| Soft, dry brush | Removes crumbs and powder from the chute, sensor, and dispensing wheel | No |
| Microfiber cloth | Wipes dust from removable parts and the hopper | No |
| Wooden skewer or plastic tool | Gently loosens a visible pellet without scratching plastic | Yes |
| Replacement batteries or the original power adapter | Helps rule out weak power as the cause of a stalled motor | Yes |
| Pet-safe dry food | Used for a controlled test after cleaning | No |
Do not use water inside the motor housing, cooking oil on the gears, metal tools, compressed air close to sensors, or household cleaners where food touches the machine. If you use a vacuum, keep its nozzle away from loose wires and delicate sensors.
Step-by-Step
See also: How to Remove Litter Box Odor Buildup (2026): Step-by-Step • How to Fix a Jammed Automatic Feeder (2026): Step-by-Step
1. Stop the feeder and protect the next meal (2–3 minutes)
Press the stop, pause, or manual-feed button if the controls respond. Then unplug the feeder or remove its batteries. If it uses both a wall adapter and battery backup, disconnect both power sources. A jammed motor can start unexpectedly when the schedule advances, so do not reach into the chute while the feeder is powered.
Check the clock and feeding schedule once the unit is safe. Write down the missed portion or set a reminder to feed your pet manually. If the feeder serves multiple animals, separate them during our research so one pet does not eat the entire test portion.
2. Empty the hopper completely (5–10 minutes)
Remove all food from the hopper and place it in a clean, dry container. Do not simply scoop out the top layer. Food packed around the dispensing mechanism can remain hidden below the surface and create another jam.
Inspect the kibble under bright light. Look for pieces larger than the feeder’s recommended size, irregular shapes, broken fragments, dust, or food that feels soft or greasy. As a practical test, pour a small handful through the dispensing opening by hand. If it bridges together instead of flowing freely, the food may be unsuitable for that feeder even if it is labeled “dry.”
3. Inspect the chute and dispensing wheel (5 minutes)
Look into the outlet, chute, auger, paddle, or rotating wheel. A flashlight can help you see a pellet wedged at an angle. Remove only loose pieces that you can reach easily. Use a wooden skewer or plastic tool for a visible obstruction, applying light pressure away from the motor and electrical parts.
Do not force the wheel by hand if it resists. Excessive pressure can strip plastic gears or crack the dispensing compartment. Also inspect the portion sensor, if your model has one. A coating of food dust can make the feeder incorrectly report an empty path or fail to recognize that food has dropped.
4. Clean and dry the food path (10–15 minutes)
Follow the manual to remove the hopper, lid, dispensing tray, and any dishwasher-safe parts. Brush crumbs from seams and corners, then wipe removable parts with a barely damp cloth if the instructions allow it. Dry everything completely before reassembly. Even a small amount of moisture can make kibble stick together and cause a repeat jam.
Pay particular attention to the narrowest point in the path. Powdered food often collects there and acts like glue. Clean the underside of the hopper as well as the visible chute. Keep the motor housing, control panel, adapter connection, and battery compartment dry.
5. Check the power source and reassemble (3–5 minutes)
Inspect the adapter for cuts, bent prongs, or a loose connection. Use only the voltage and adapter type specified on the feeder’s label; do not substitute a charger because its plug fits. If the feeder accepts batteries, install a fresh, matching set rather than mixing old and new cells.
Reinstall every removable part until it is seated firmly. A lid or hopper that sits slightly crooked can narrow the food path. Confirm that the dispensing tray is level and that no cleaning cloth, packaging, or loose screw is inside the compartment.
6. Test with a small amount of food (5 minutes)
Load only a small quantity—about 1 cup or enough for several test cycles—rather than refilling the entire hopper. Use kibble that fits the manufacturer’s stated size and shape limits. If you no longer have the manual, start with small, round or uniform pieces and watch closely.
Place a measuring cup under the outlet. Run the manual-feed command three to five times, waiting for the mechanism to stop between portions. Listen for grinding, clicking, repeated motor cycling, or a hum without food movement. Measure the output each time. A portion that varies dramatically can indicate a worn wheel, slipping gear, sensor problem, or food-flow issue.
7. Restore the schedule and monitor it (24 hours)
Once the test is consistent, refill the hopper to no more than two-thirds full for the first day. A completely full hopper creates more pressure on the lower food path and can expose a problem that did not appear during our research. Confirm the time, portion size, and number of meals.
Observe the next scheduled feeding and check the bowl afterward. For the first 24 hours, look for a stalled motor, unusually warm housing, food dust buildup, or a portion that stops halfway through. If the feeder jams again, empty it rather than repeatedly pressing manual feed.
Mistakes to Avoid
- Running the motor while clearing the jam: Unplug first, even if the obstruction looks harmless.
- Overfilling the hopper: Start below two-thirds full after a repair and avoid packing food down.
- Using oily or moist food: Grease and humidity encourage clumping. Automatic feeders are generally designed for dry food.
- Crushing kibble into the mechanism: Pushing harder can turn one large obstruction into many compacted pieces.
- Adding lubricant: Oil can contaminate food, attract dust, and damage plastics unless the manufacturer specifically approves a food-safe lubricant.
- Ignoring portion accuracy: A feeder that dispenses food but delivers double portions still needs service or replacement.
- Testing only once: Run at least three cycles. A partial jam may clear temporarily and return at the next meal.
How Often
Inspect the food path weekly if the feeder runs every day, especially when using dusty kibble. Empty and brush the hopper every two to four weeks. Wash approved removable parts monthly, or more often if food looks greasy or the room is humid. Check the outlet and portion size after changing food brands, because kibble dimensions can differ substantially.
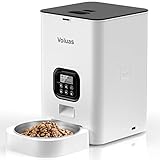
For comparison, a VOLUAS 4-liter timed dry-food dispenser is suited to a smaller daily supply, while a large-breed feeder advertised at 12 liters or 50 cups may hold food for up to 20 days depending on portion size. Larger capacity does not mean it should be filled and ignored for 20 days; routine inspections remain important. Typical purchase prices range from about $40 to $100, with the referenced models priced at $41.79 and $99.99.
When to Call a Pro or Replace
Contact the manufacturer or a qualified appliance repair technician if the motor grinds after the food path is clear, the housing becomes hot, the power cord smells burned, or the feeder repeatedly resets. Stop using it immediately if you see melted plastic, exposed wiring, sparks, or liquid inside the electrical compartment.
Replacement is usually more sensible when the unit has stripped gears, a cracked hopper, a failing control board, or a dispensing error that persists with suitable food and a stable power supply. Compare the repair cost with a new feeder in the roughly $40–$100 range. Until the unit proves reliable through several scheduled cycles, provide meals manually.
FAQ
Why does my automatic feeder keep jamming?
The most common causes are oversized or irregular kibble, oily food, moisture, food dust, overfilling, and a worn dispensing wheel. A feeder can also jam when a small piece becomes wedged at the narrowest part of the chute. Empty, clean, dry, and test the path before changing settings.
Can I use wet food in an automatic feeder?
Not unless the feeder is specifically designed and labeled for wet food. Most timed dry-food dispensers are not refrigerated and cannot safely handle wet food. Wet food can clog the mechanism, spoil, and create a health risk for your pet.
How do I prevent a jam overnight?
Use food within the manufacturer’s size limits, keep it dry, and avoid filling the hopper to the top. Run three manual portions before bedtime and confirm that the outlet is clear. For a newly repaired feeder, keep a backup meal available and check the first overnight feeding in the morning.
Why does the feeder make noise but dispense nothing?
The motor may be turning against a compacted blockage, the dispensing wheel may be stripped, or the food may be bridging above the outlet. Unplug the feeder, empty it, and inspect the wheel and chute. If the motor still hums without moving food after cleaning and reassembly, stop testing and contact the manufacturer.
Ready to decide? Our #1 pick for 2026 is the Small, dry measuring cup.
Live price & availability on Amazon.